Advertisement
Shutterstock
VOICES

Grow it yourself 'Onions - a phenomenally useful veg'

Onions have been revered through time, not only for their culinary use, but also for their therapeutic properties, writes Michael Kelly.

ONIONS HAVE BEEN revered through time, not only for their culinary use, but also for their therapeutic properties. The liberal use of the allium species, including garlic, leeks and different varieties of onions has been associated with beneficial effects on cholesterol levels and heart disease.

Onions are one of the few vegetables that are a source of biotin, a B vitamin, which is important for healthy hair and nails. Biotin also helps your body to digest fatty foods (hence that steak and onions pairing).

Onions are also a phenomenally useful vegetable to grow for the kitchen. There are of course very few meals that don’t involve the peeling and chopping of an onion. So, it’s a stroke of wonderful good fortune that one of the healthiest and more useful kitchen vegetables is also very easy to grow. A decent sized raised bed will produce a couple of hundred onions (you get approximately 40 onions per meter in a 1.2m wide bed), which would be enough for most families for up to a year.

So, how do you know when your onions are ready to harvest?

Thankfully onions are rather helpful on this matter, providing you with an indicator of sorts so you know when they are ready. The foliage on the onions will turn yellow and literally topple over (approximately 20 weeks after sowing).

One of the most remarkable sights you will ever see in your vegetable plot is a bed of onions getting itself ready for harvest. In the last weeks of summer, a nutrient tug-of-war of sorts happens between the bulb and its foliage which of course you are hoping the bulb will win. The bulb starts to suck all the vitamins and minerals from the foliage until finally, thoroughly beaten, the foliage turns yellow, withers and then topples over dramatically in a final act of surrender.

It’s a good idea at this stage to gently loosen the soil around the onions (or turn the onion very carefully and very slightly in the soil. Loosening the soil like this allows the onion to expand in the soil. After this, leave for another two weeks, and then your onions are ready to be picked. Lift them carefully (you may be able to ease them out without using a fork, but be careful not to damage the necks as you pull them). It’s worth eating a few of them at this stage, because they are literally bursting with nutrition.

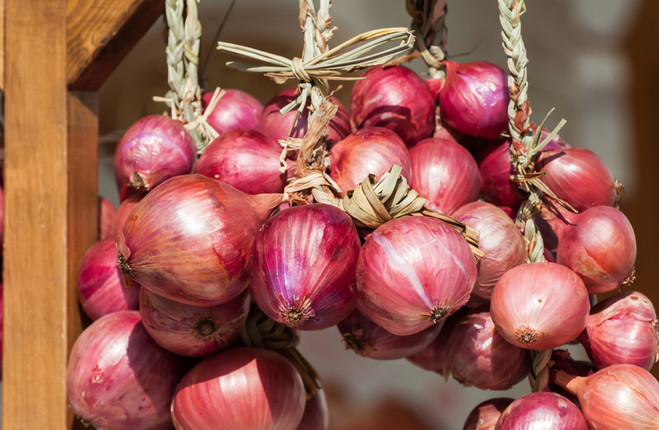
Having braided them, I will leave them in the shed for another month or so and then move them into the kitchen. Braiding onions is a time-consuming process, but if there’s a more beautiful kitchen decoration than a home-grown onion braid, I’ve yet to see it. I think I’ve mentioned here before that the onion braid hanging in the kitchen makes me smile each time I see it.

It’s a daily reminder that I am not such a bad grower after all, and a potent symbol of the wonderful potential of backyard food growing to make you more food secure.

The Basics – Storing Onions

It’s perfectly fine to eat onions “fresh” straight from the ground, but the key to getting them to store is to get all the moisture from the neck and skin which means drying them out well. The ideal way to dry them is to leave them out in the sun and wind, but of course the Irish climate’s fondness for precipitation can play havoc with this plan and so, if I have to, I resort to laying them out on a wire rack in my potting shed for about 2-3 weeks and then hanging them in a twine braid.

To make a braid, simply make a loop with a piece of twine, and wrap the withered stems of the onions around the twine. It’s a good idea to clean the onions before braiding them, getting most of the dried soil or damaged skins cleaned off.

Make sure to store your hard-earned onions somewhere very dry – if there is any moisture at all in the air, the onions may rot. I stored them in our porch one year and lost several braids because the air was too damp there. Check the braid frequently and use/remove any onions that are showing any signs of softening. Remove any shoots that form over the winter.

Recipe of the Week – Grilled Summer Veg

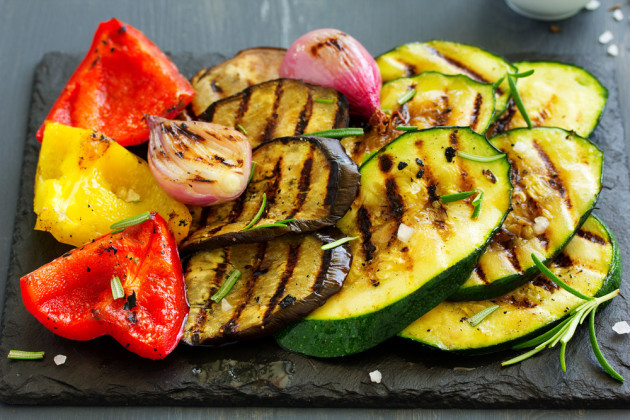
shutterstock_445262008 Lesya Dolyuk via Shutterstock Lesya Dolyuk via Shutterstock

You can play around with the quantities of the core vegetable ingredients in this recipe, depending on how many are available to you – really it doesn’t matter how much of them you use. You can add some finely chopped, seasonal herbs at the end before serving.

Ingredients

  • 2-4 courgettes
  • 2 florence fennel bulbs
  • 2-3 spring onions, chopped
  • 4-6 tbsp olive oil
  • 1 garlic clove, finely sliced
  • Juice of 1 lemon

Cut the courgettes and fennel bulbs lengthwise into thin slices and set aside in a large bowl with the spring onions. In a small bowl, mix the oil, garlic and lemon juice and season really well.

Pour this over the vegetables and mix well to ensure they all have a decent covering. The veg can either be fried up in a frying pan (you won’t need to add oil), cooked on a barbecue or griddle pan, or grilled.

You are aiming to get them nicely charred, not burned, and tender inside. Just a few minutes on each side should do. Serve warm.

Michael Kelly is founder of GIY and GROW HQ. 

Click here for more GIY tips and recipes.

Voices

Your Voice
Readers Comments
16
    Submit a report
    Please help us understand how this comment violates our community guidelines.
    Thank you for the feedback
    Your feedback has been sent to our team for review.