Sign in. It’s quick, free and it’s up to you.
An account is an optional way to support the work we do. Find out more.
Sign in. It’s quick, free and it’s up to you.
An account is an optional way to support the work we do. Find out more.
IF YOU’VE SUFFERED through a bad flatpack furniture experience, you’d be forgiven for considering giving up on self-assembly entirely.
That bedside locker is nice, you tell yourself, but it’s not worth eight tearful hours trying to decipher an instruction manual that’s surely been written in code (or worse, contains no words at all).
For some people though, the assembly process is genuinely enjoyable – or at least, they’ve figured out a system that makes it a breeze. Every fortnight, Laura de Barra brings her home maintenance expertise to the Glenveagh Home Magazine on TheJournal.ie – and this week she’s sharing her hard-earned flatpack assembly secrets.
I live for flatpack furniture and have built over 230 pieces in the last year alone. Here’s my step-by-step guide:
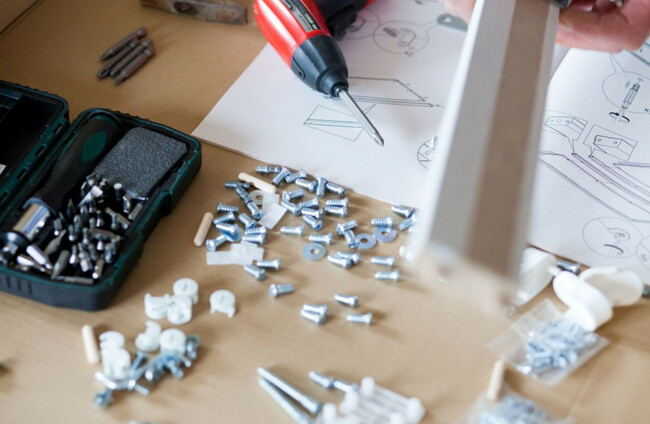
1. First, always lay down a dust sheet: Using a dust sheet (or an old bed sheet) prevents scratching of your floor. Make sure it is non slip by taping down edges. If you are building a dining table, for example, make sure the table top is laying face down on a rug, dust sheet or its box. So many people will build a table on a bare floor and damage both the floor and the table in the process.
2. Unpack every single item before you start (and put away the packaging): Take everything out of the boxes and remove all cardboard and plastic bags before you start – without accidentally binning anything important. This gives you space to work and also means there are no trip or slip hazards. Building in a clean space is always better for focus.
3. Double check that you have every item listed in the manual: Open the first page of the instruction booklet, where there should be an itemised list of contents. If no manual has arrived, see if it’s available online before you entirely give up, as this will save any back and forth with the company you bought it from. If you are particularly bad at flatpacks there may even be an online tutorial on the piece you are building.
4. Divide screws, bolts etc in to types and sizes: I like to keep these separated in cups or containers for ease when building and to avoid losing any.

5. Make sure you have all the tools you need (and don’t be afraid to use your own stuff): Flatpacks are notorious for arriving with weak, cheap tools and this is the main reason so many of us hate them. The ones that come with the pack usually weaken as they are used and each screw takes more effort. If you can, buy a basic allen key and spanner set, I promise that future jobs will be a lot smoother.
6. Read through the entire directions once before you start: Don’t just dive straight in. Reading through will help enormously as you build as you already know a little bit about how it’s going to come together. For bigger pieces, reading ahead also lets you know if there is any flipping of the piece to be done. That way, you can choose your starting point to ensure you will have enough room to move it as needed.
7. Invest in a pair of DIY-friendly gloves: I use these for a few reasons: you’re less likely to damage nails, jewellery etc; you can avoid splinters; you get a better grip on tools; and you get a better grip on the flatpack pieces themselves. Footwear wise, never do a flat pack barefoot or in an open toe shoe. Trust me.
8. Don’t throw out tools and spare parts: When you are finished building, tape any of the small tools (at least, the ones that were useful) or spare screws/dowels that came in the flatpack to the underside of the furniture piece, to ensure you can tighten up anything that comes loose during its life. This is an especially good tactic for drawers and kitchen chairs.
9. Make it an enjoyable process. Seriously: Don’t sweat it. Listen to some great music or a brilliant podcast while you work. Make this a mindful time.
Follow @lauradebarra on Instagram for more pro cleaning tips (and plenty of other fabulousness too).

To embed this post, copy the code below on your site


have your say