Sign in. It’s quick, free and it’s up to you.
An account is an optional way to support the work we do. Find out more.
Sign in. It’s quick, free and it’s up to you.
An account is an optional way to support the work we do. Find out more.
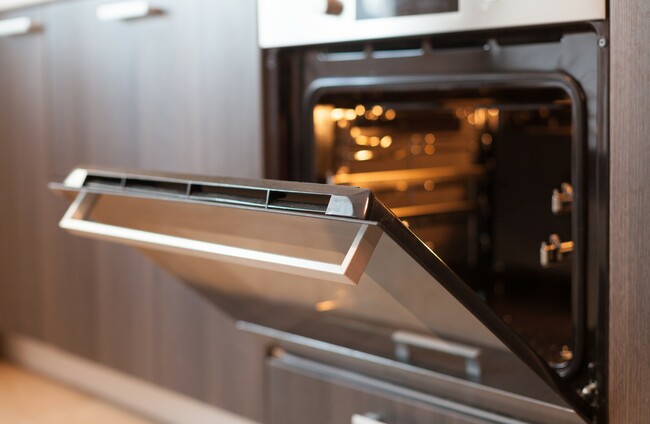
LAURA DE BARRA regularly brings her lifestyle and home maintenance masterclasses to the Glenveagh Home Magazine on TheJournal.ie. This week: how to give your oven back its like-new shine.
A TASK WE all avoid! Oven cleaning is one of the least enjoyable ‘big jobs’ in the home so let’s make as painless as possible.
My rule is to never clean kitchen appliances or fittings with anything you wouldn’t clean a plate with, so we are going for all-natural cleaners here. While harsh oven cleaners can be super effective and quick, they can linger for a long time after use and let’s face it, are neither good for us or the environment.
The best part about using natural cleaners is that they only usually need time to be as effective as harsher cleaners, which means you get to do something else while they work their magic!
For really grim ovens, it is best to leave one of the stages over night so I would recommend starting your oven clean in the evening and coming back to it the next morning when everything has loosened.
You’ll need:
1. Prep
Switch off the oven and make sure it has cooled down if it was recently used. When cleaning your oven, avoid touching or applying product to heating elements.
A current Instagram cleaning trend is to take your oven door apart to clean it in pieces. Whilst it gives you access to harder to reach places, these doors are not designed to be disassembled and the little bit of effort required to get to those areas is worth it. If you are removing your oven door etc regularly, it will have an impact on the life of the door.
Also, to note, I have seen this go wrong so many times. When the glass is removed from the door, the door will spring up really quickly which often leads to the glass getting knocked and smashing. The only way to maintain a stunning oven door is to wipe it down after each use.

2. A goddess bath
Prep a basin and a sink of glorious warm water and washing up liquid. Slide out all racks and pop them in to sink to soak. If only half fits, remember to rotate them every so often so all parts are getting some stunning soaking time. Many people soak theirs in their bath, but I will leave this one up to you…
If it is super bad, consider an overnight soak.
3. Double cleanse
With a damp cloth, wipe down the interior of the oven. This will drag any crumbs or dirt out of your way. Pay particular attention to the rubber seals and the hinges of the door. (never apply anything other than water to rubber seals, many products can damage this)
Ovens build up so much grease that it’s best to wash the whole interior down first using your cloth and basin of soapy water. Washing up liquid is a fantastic degreaser so it will cut through even the toughest of grease without harming the oven. This will remove the first layer of grease and make tackling dried on stains later, much easier.

4. Apply a mask
Next, mix some bicarbonate of soda and water until you have a thick paste. You’ll have noticed which parts of the oven have the worst stains (most likely on the floor of the oven where something has dripped down) during the last stage and need your attention here.
Coat them in your bicarb paste, using your gloved hands – as though you are applying a face mask to her. If you have a lot of brown specks on the walls of your oven, its best to also apply a light coat to these. Lastly apply a light layer to the oven door.
This needs to be left for a minimum of three hours but is best overnight. So go do something glorious or sleep while she works her magic on your oven interior.
5. Apply acid
Ready for the next stage? Pop an old towel under the door of the oven to catch any spills. This is about to get messy!
Grab a dry cloth and wipe out as much of the bicarb as will come away easily. The rest will be removed with vinegar so don’t worry about any that is left, you just want to get the thicker lumps out of your way.
Using your spray bottle of vinegar, spray down the interior and door of the oven. When bicarb and vinegar meet, they create a dramatic, bubbling reaction. So, don’t be alarmed if you see it rise, hiss and bubble in this stage. This will eat into any of the more stubborn stains, making them a lot easier to remove.
Using a damp cloth, wipe down all surfaces. You may need a couple more rounds of vinegar spray if you have a lot of staining coming away. (Vinegar is also great for the oven glass as it leaves it super shiny.)
Most of the staining will have lifted at this stage, but if you are left with some really tough patches on the floor of the oven you can use a scraper on these. Non scratch scrapers are so easy to pick up and are not expensive (a couple of quid usually). They are also great for using on stubborn stains on your racks. If you don’t have one, a spoon can also work here – but be careful not to scratch the oven’s interior.
6. Final cleanse
Last stage is to wipe the oven down with damp cloth to remove any product. Pop your racks back in and she’s finished!
Tips to avoid food and grease build up in the future:
When we finish cooking, we wipe down all surfaces as we clean up, but rarely include the oven, which has had the most exposure to grease.
After each use, a layer of grease, along with food spills will cool down and set. It will then burn during the next use, turning it brown and making it harder remove. A simple clean after each use will stop all of this. In future, once the oven has cooled down, wipe down the interior and the door with warm soapy water. This will remove any grease that has clung to the surfaces during cooking and prevent build up.
As with the dishwasher, oven racks and trays should be taken out and wiped down after use. If you avoid doing this, you’ll end up with those brown stubborn marks that will need a deep clean all over again. The few minutes that it takes is super worth it.
Want more tips and hacks? Laura de Barra’s debut book, Gaff Goddess: Simple Tips And Tricks To Help You Run Your Home is on shelves now, published by Transworld Ireland. Buy it here or in all good bookshops, and follow Laura on Instagram for even more cleaning and lifestyle tips.

To embed this post, copy the code below on your site


have your say