Advertisement
VOICES

From the Garden Learn how to really grow parsnips, earth up spuds and make wild garlic pesto

‘Most parsnip seed packets will tell you to sow them in February – don’t do it,’ writes Michael Kelly.

THIS WEEK I will be sowing my parsnips outside in the veg patch.

Unlike carrots, they are relatively easy to grow (once you have persuaded them to germinate) and since they store well in the soil over the winter they are a valuable winter storage crop.  

I grow around 40 parsnips which is more than enough to keep us happy from November, when we start hankering for root crops, until next March.

To do this I need to allocate around 2m of growing space – in a standard bed you will get three rows of parsnips.

Although I practice mainly a no-dig type of growing I always put a bit of work into the root crop bed, where carrots and parsnips will be sown. 

I start by turning over the soil with a fork, to a depth of a foot, which I think is the key to a decent crop since the roots can descend into the soil happily – with no obstructions such as hard soil or stones to thwart their growth.

I then rake the soil well to even it off before sowing and break up and large clods of soil.

Most parsnip seed packets will tell you to sow them in February – don’t do it.  

It is far better to leave it until around now when germination will be more reliable thanks to warmer weather. 

To sow, make a drill 2cm deep – if the soil is dry, dampen. Sow one seed every 5cm in rows 30cm apart and cover in with soil.   Germination takes up to three weeks.

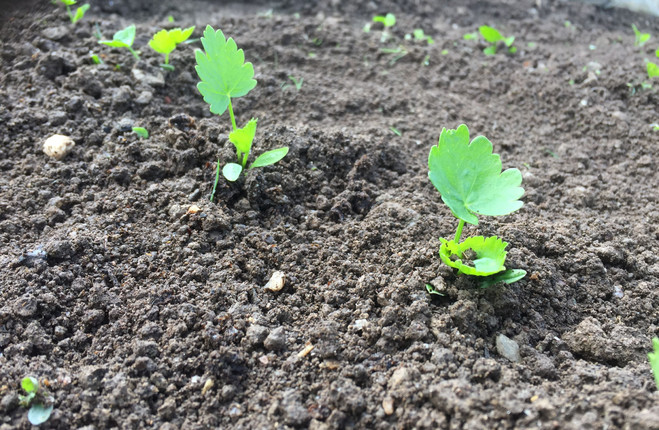
When seedlings appear, thin to 10cm apart for medium sized parsnips. Once you have sown them, there is very little maintenance needed.  

Weed carefully until well established and watering shouldn’t be necessary except in dry spells.

Parsnips are ready to rock when the foliage starts to die away in autumn but the flavour improves after first frosts. 

Lift them out of the soil carefully with a fork. Leave in the soil until ready to eat but lift by March.

You can watch this short GIY video tutorial on parsnips 

The Basics –  How to Earth Up Spuds

As your potato plants grow, you need to “earth them up” – this is a process of drawing soil up around the plant’s stems to cover them.

It has a number of benefits. First of all, it increases the length of underground “potato bearing” stem so that you end up with more spuds per plant. It also stops potatoes from poking through the soil, which would cause them to go green.

And finally, it is also thought to help prevent blight from travelling from the leaves of the plant into the tubers.  

Earthing up is repeated every three weeks or so. Start by loosening the soil between the rows of plants using a fork – this will clear the soil of any weeds and make it easier to work with.  

Then using a rake or a ridging hoe, draw the soil up around the potato plants covering about half of the stem (10cm).

If you are growing your potatoes in containers or sacks, simply add more compost (about 5cm) at regular intervals until the container is almost full.  

Recipe of the Week – Wild Garlic Pesto

Wild garlic is abundant right now and it’s at its best in April and May.  

This recipe uses the wild garlic leaves instead of basil which is not in season at the moment.

Usually found in moist, wooded shaded areas the leaves of wild garlic are relatively easy to identify by their overpowering smell of garlic.   They are often referred to as Ramsons.

This pesto will keep in the fridge for over 3 weeks and can be used in pasta or served on bruschetta.

If you don’t have spring onions or leeks in the veg patch, you could use shallots instead.

Ingredients:

  •  100g freshly picked wild garlic leaves
  • 50g spring onions or leeks

  • 50g shelled walnuts

  • 200 ml olive oil

  • 50g mature hard cheese (e.g Parmesan or a hard goat’s cheese), finely grated

  • ½ teaspoon of sea salt

  • ½ teaspoon sugar

Directions:

Wash the garlic leaves and discard any coarse stalks. Place in a food processor along with walnuts, shallot and 150 ml oil. Blend for about a minute until well chopped up.  

Add in the cheese, salt and sugar and stir well. Fill into clean sterilised jars to within 5cm of the top of jar.

Press down firmly with the back of a spoon to remove any pockets of air and then add the remaining oil to seal the surface.

When you come to use the pesto, stir it well before spooning out.

Make sure the surface of any pesto remaining in the jar is completely covered with oil before you return to the fridge.

Michael Kelly is an author, broadcaster and founder of GIY.

GIY Ireland 2019 – all rights reserved.

Your Voice
Readers Comments
4
This is YOUR comments community. Stay civil, stay constructive, stay on topic. Please familiarise yourself with our comments policy here before taking part.
Leave a Comment
    Submit a report
    Please help us understand how this comment violates our community guidelines.
    Thank you for the feedback
    Your feedback has been sent to our team for review.

    Leave a commentcancel