Sign in. It’s quick, free and it’s up to you.
An account is an optional way to support the work we do. Find out more.
Sign in. It’s quick, free and it’s up to you.
An account is an optional way to support the work we do. Find out more.

THOUGH A SLIGHT cold snap has returned this week, the spring has been good to us so far.
In GROW HQ, our head grower Richard has a spring in his step and is delighted with how dry the ground is, particularly when you compare that to the conditions last year.
At home this week, I made some good progress in the veg patch and now have the onion sets, new potatoes, peas and broad beans sown outside.
With colder nighttime temperatures returning, I have a fleece on the onion sets just in case. It also keeps the pigeons away. The garlic crop is doing well, and I still have leeks, celeriac, carrots and sprouting broccoli in the ground from last year.
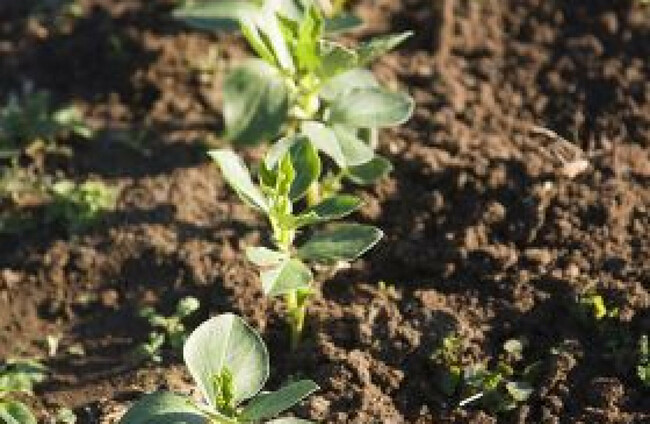
The broad beans which I sowed in late February have emerged from the soil now in the veg patch. I didn’t get around to sowing over-wintering ones last October, which is a pity because they certainly benefit from being sown like that.
Over-wintered broad beans are ready a little earlier, and less inclined to have problems with blackfly which are a considerable pest for the plant. Pinching off the tops of the plants is considered a treatment for this since the blackfly enter on the softest leaves on the plant.
The ladybird is an important predator for blackfly so they can sometimes sort the problem out for you. Have you noticed there are loads of ladybirds around this year?
This year I am growing dwarf varieties of broad beans which hopefully won’t need supports. These are the little time-savings that make me happy. All broad beans are entirely efficient, taking the nutrients they need from the air.
They don’t, therefore, need much nutrition added to the soil, just a handful of seaweed dust. Youngest Child helped out with sowing the peas. I sowed just one row about 3m long, in a 15cm wide/5cm deep trench and she sowed the peas along the trench in a zig-zag. We will sow another row in about a month.
In the potting shed, things are hotting up. I’ve tomatoes at various stages of development, that will require pricking out into module trays in the week ahead. A tray of beetroot sowed in February is now ready for planting out into the tunnel. I also sowed by celery and celeriac this week.
Both of these seeds need light for germination, so the tiny seed is just sprinkled on to the surface of shallow trays of seed compost. You can cover over with a layer of fleece just to stop water evaporating off the surface. In about a month’s time, I will be transplanting the little seedlings into module trays.
The Basics: Potting Compost
Potting compost is the medium that is used to sow seeds in. Potting compost is completely different to compost that you might make yourself in the garden from rotting plant matter. I always found this rather confusing when I started growing. For starters, potting compost is a sterile medium which means you know there are no weed seeds in it.
It also retains moisture very effectively which is important for your seeds.
Interestingly, unlike your homemade garden compost, potting compost is very low in nutrients so it is only ever used for starting seeds off. If you intend to grow a plant to maturity in a pot, it will need to be transplanted into a medium that has more nutrients in it e.g. a mix of garden compost and soil etc.
Seeds do not need to be sown in a medium that is rich in nutrients since they already have all the nutrients they need for germination.
It’s worth buying good quality potting compost – ideally one that is approved for use in organic production and peat-free. I’ve bought cheap compost over the years and I am almost always disappointed with the results.
Recipe of the Week: Hearty Chard Curry
Continuing in the same vein as last week, this week’s recipe takes one staple Hungry Gap veg (in this case chard) and makes something delicious of it using ingredients generally available in the store cupboard.
Ingredients:
• 500g Swiss chard
• 2 tablespoons sunflower oil
• 1 onion, halved and finely sliced
• 3 garlic cloves, peeled
• 1 green chilli, deseeded and finely chopped
• 3cm piece of ginger, peeled and chopped
• 1 teaspoon garam masala
• ½ teaspoon mustard seeds
• ½ teaspoon ground cumin
• ¼ teaspoon ground turmeric
• 3 cardamom pods, bashed
• 350g potatoes, cubed
• 250g plain (full-fat) yoghurt
• 1½ tablespoons tomato purée
• A small bunch of coriander, roughly chopped
• A small handful of almonds, cashews or pistachios, toasted and chopped
Directions:
Separate the chard leaves from the stalks. Cut the stalks into 2cm to 3cm pieces and roughly chop the leaves.
Heat the oil in a large saucepan over a medium heat, add the onion and fry until just golden.
Meanwhile, pound the garlic, chilli and ginger together with a pinch of salt to a paste. Add to the onion and cook, stirring, for a couple of minutes.
Tip in the rest of the spices and stir for a minute or two. Add the potatoes and chopped chard stalks and fry, stirring frequently, for 5 minutes, so that they are well coated with the spice mixture.
Pour in about 400ml water – enough to just cover the veg. Bring to a simmer, cover and cook for 10–12 minutes until the potatoes are just tender.
Add the chard leaves, stir and cook until just wilted. In a bowl, whisk together the yoghurt, tomato puree and some of the hot liquid from the curry.
Remove the curry from the heat, stir in the yoghurt mixture, return to the heat and warm through very gently (if it gets too hot, the yoghurt will curdle).
Stir in most of the coriander. Taste and add salt and pepper if needed. Scatter over the toasted nuts and remaining coriander, then serve with rice and naan bread.
Michael Kelly is an author, broadcaster and founder of GIY.
© GIY Ireland 2019 – all rights reserved.
To embed this post, copy the code below on your site


have your say